
安装LAMP环境
LAMP环境就是Linux+Apache+Mysql+PHP。
甲骨文公司收购了MySQL后,有将MySQL闭源的潜在风险。
MariaDB数据库管理系统是MySQL的一个分支,主要由开源社区在维护,采用GPL授权许可。 因此目前Mysql被MariaDB所代替。 MariaDB的目的是完全兼容MySQL,包括API和命令行,使之能轻松成为MySQL的代替品。 Linux系统Centos 7是比较稳定,属于redhat开源社区分支,操作一致。
安装Apache Web服务器
Apache服务器是目前最流行的Web服务器,也可以选择Nginx。
运行以下命令安装:
sudo yum install httpd
安装完成之后我们就可以运行以下命令启动Apache服务器了:
sudo systemctl start httpd.service
之后我们就可以在浏览器中打开 http://your_server_IP_address/
我们新安装的网站,检查一下Apache是否安装成功,正常运行。 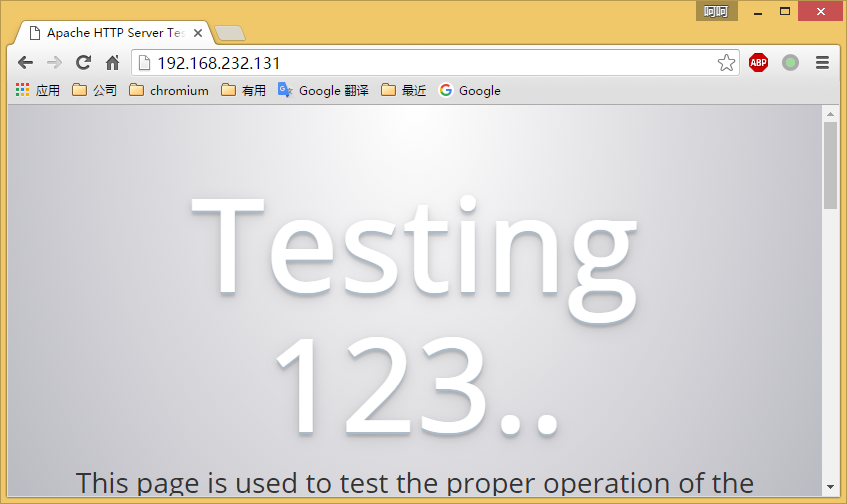
修改防火墙设置
如果在 console 用 curl 访问服务器有响应,而浏览器没响应,即防火墙限制了外包访问,设置防火墙允许80端口:
sudo iptables -I INPUT -p TCP --dport 80 -j ACCEPT
或者这样,防火墙放行 http 和 https 协议:
sudo firewall-cmd --permanent --zone=public --add-service=http
sudo firewall-cmd --permanent --zone=public --add-service=https
sudo firewall-cmd --reload
这次可以正常访问了:
如果想以后重启服务器之后自动启动Apache服务器,可以运行以下命令:
sudo systemctl enable httpd.service
Apache服务器的网站文件默认在/var/www目录。
安装Mysql(MariaDB)数据库
运行以下命令安装MariaDB数据库:
sudo yum install mariadb-server mariadb
完成之后启动数据库:
sudo systemctl start mariadb
sudo systemctl status mariadb.service
配置mariadb数据库
然后安装一个数据库安全脚本,去掉一些危险的默认设置:
sudo mysql_secure_installation
然后会提示你输入数据库的root账号密码,如果是新安装的则输入空格,如下所示:
In order to log into MariaDB to secure it, we'll need the current
password for the root user. If you've just installed MariaDB, and
you haven't set the root password yet, the password will be blank,
so you should just press enter here.
Enter current password for root (enter for none):
然后我们输入空格,继续设置root密码:
Setting the root password ensures that nobody can log into the MariaDB
root user without the proper authorisation.
Set root password? [Y/n] Y
New password:
Re-enter new password:
Password updated successfully!
Reloading privilege tables..
 ... Success!
By default, a MariaDB installation has an anonymous user, allowing anyone
to log into MariaDB without having to have a user account created for
them. This is intended only for testing, and to make the installation
go a bit smoother. You should remove them before moving into a
production environment.
Remove anonymous users? [Y/n]
 ... Success!
Normally, root should only be allowed to connect from 'localhost'. This
ensures that someone cannot guess at the root password from the network.
Disallow root login remotely? [Y/n]
 ... Success!
By default, MariaDB comes with a database named 'test' that anyone can
access. This is also intended only for testing, and should be removed
before moving into a production environment.
Remove test database and access to it? [Y/n]
 - Dropping test database...
 ... Success!
 - Removing privileges on test database...
 ... Success!
Reloading the privilege tables will ensure that all changes made so far
will take effect immediately.
Reload privilege tables now? [Y/n]
 ... Success!
Cleaning up...
All done! If you've completed all of the above steps, your MariaDB
installation should now be secure.
Thanks for using MariaDB!
设置开机自动启动MariaDB数据库:
sudo systemctl enable mariadb.service
安装PHP
运行以下命令安装PHP:
sudo yum install php php-mysql
安装完成,重启以下Apache服务器:
sudo systemctl restart httpd.service
查看php状态
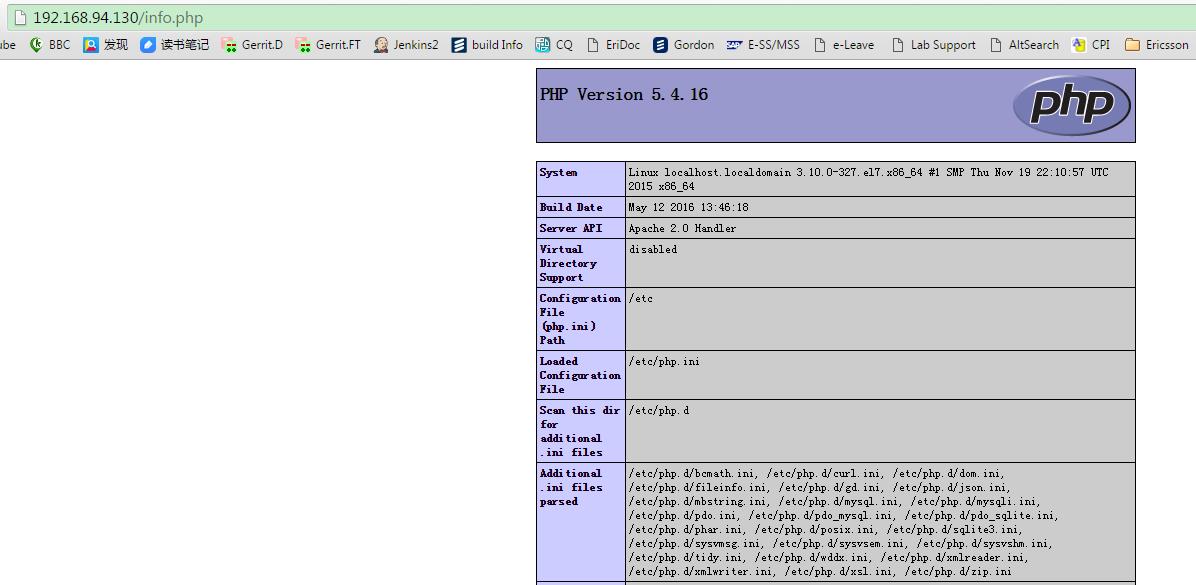
PHP安全完成之后,我们可以在网站目录下面建立一个info.php的文件, 查看php的安装情况我们在/var/www/html目录创建一个info.php的文件:
sudo vi /var/www/html/info.php
其info.php内容如下:
<?php phpinfo(); ?>
我们我们安装PHP成功,浏览器打开 http://your_server_IP_address/info.php 将会看到以下内容:
安装phpMyAdmin
phpMyAdmin是个管理MariaDB数据库的Web界面程序.
非常好看,便捷。 我们首先安装EPEL库,这个库提供很多额外的软件包:
sudo yum install epel-release
完成之后直接安装phpMyAdmin:
sudo yum install phpmyadmin
完成之后,我们设置phpMyAdmin的httpd设置 /etc/httpd/conf.d/phpMyAdmin.conf:
Alias /phpMyAdmin /usr/share/phpMyAdmin
Alias /phpmyadmin /usr/share/phpMyAdmin
<Directory /usr/share/phpMyAdmin/>
AddDefaultCharset UTF-8
<IfModule mod_authz_core.c>
# Apache 2.4
<RequireAny>
Require ip 127.0.0.1
Require ip ::1
</RequireAny>
</IfModule>
<IfModule !mod_authz_core.c>
# Apache 2.2
Order Deny,Allow
Deny from All
Allow from 127.0.0.1
Allow from ::1
</IfModule>
</Directory>
从配置中可以看出,可以用 http://your_server_IP_address/phpmyadmin去访问phpMyAdmin。
实际上我们在浏览里打开这个地址是403 Forbidden,这是因为还有权限控制,我们更改一下权限:
<Directory /usr/share/phpMyAdmin/>
AddDefaultCharset UTF-8
<IfModule mod_authz_core.c>
# Apache 2.4
<RequireAny>
#Require ip 127.0.0.1
#Require ip ::1
Require all granted
</RequireAny>
</IfModule>
<IfModule !mod_authz_core.c>
# Apache 2.2
Order Deny,Allow
# Deny from All
# Allow from 127.0.0.1
# Allow from ::1
Allow from All
</IfModule>
</Directory>
然后再重启以下Apache服务器:
sudo systemctl restart httpd.service
在浏览器输入http://server_domain_or_IP/phpMyAdmin,可以看到:
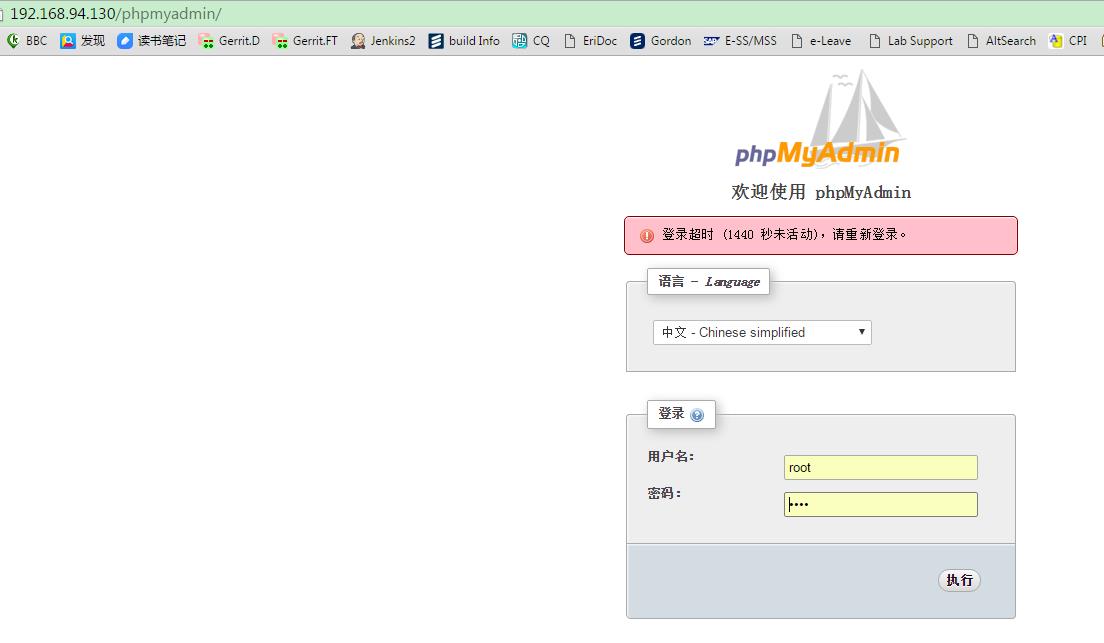
然后可以使用数据的root密码登录了。
安装Wordpress
创建数据库
我们先要创建Wordpress的数据库:对应wp-config.php的数据可,用户名,密码
# 登录数据库
mysql -u root -p
# 创建数据库
CREATE DATABASE wordpress;
# 创建数据库用户和密码
CREATE USER wordpressuser@localhost IDENTIFIED BY 'wordress_password';
# 设置wordpressuser访问wordpress数据库权限
GRANT ALL PRIVILEGES ON wordpress.* TO wordpressuser@localhost IDENTIFIED BY 'wordress_password';
# 刷新数据库设置
FLUSH PRIVILEGES;
# 退出数据库
exit
安装Wordpress
我们先下载wordpress安装包:
cd ~
wget http://wordpress.org/latest.tar.gz
然后解压出来,拷贝到/var/www/html/wordpress目录:
# 切换到wordpress目录
cd /var/www/html/wordpress
# 复制wp-config.php文件
cp wp-config-sample.php wp-config.php
# 编辑wp-config.php文件
sudo vim wp-config.php
然后在配置文件里设置正确的值:
/** The name of the database for WordPress */
#define('DB_NAME', 'database_name_here');
define('DB_NAME', 'wordpress');

/** MySQL database username */
#define('DB_USER', 'username_here');
define('DB_USER', 'wordpressuser');

/** MySQL database password */
#define('DB_PASSWORD', 'password_here');
define('DB_PASSWORD', 'wordress_password');

/** MySQL hostname */
define('DB_HOST', 'localhost');

/** Database Charset to use in creating database tables. */
define('DB_CHARSET', 'utf8');

/** The Database Collate type. Don't change this if in doubt. */
define('DB_COLLATE', '');
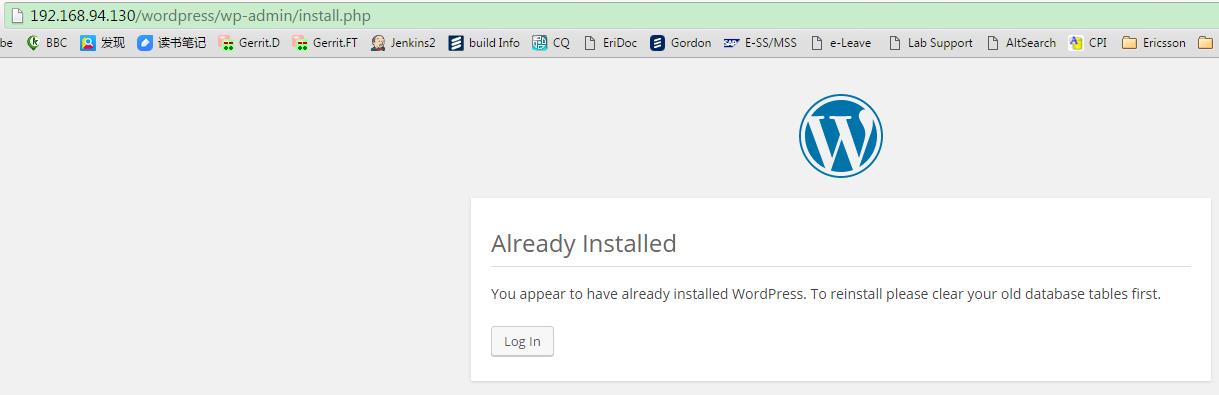
在浏览器输入http://server_domain_or_IP/wordpress/wp-admin/install.php后就可以进行最后的登陆安装,
输入站点名称,登陆户名,密码,邮箱就可以完成Wordpress安装!
按照提示创建好博客,显示如下:
上图为已创建好的博客。
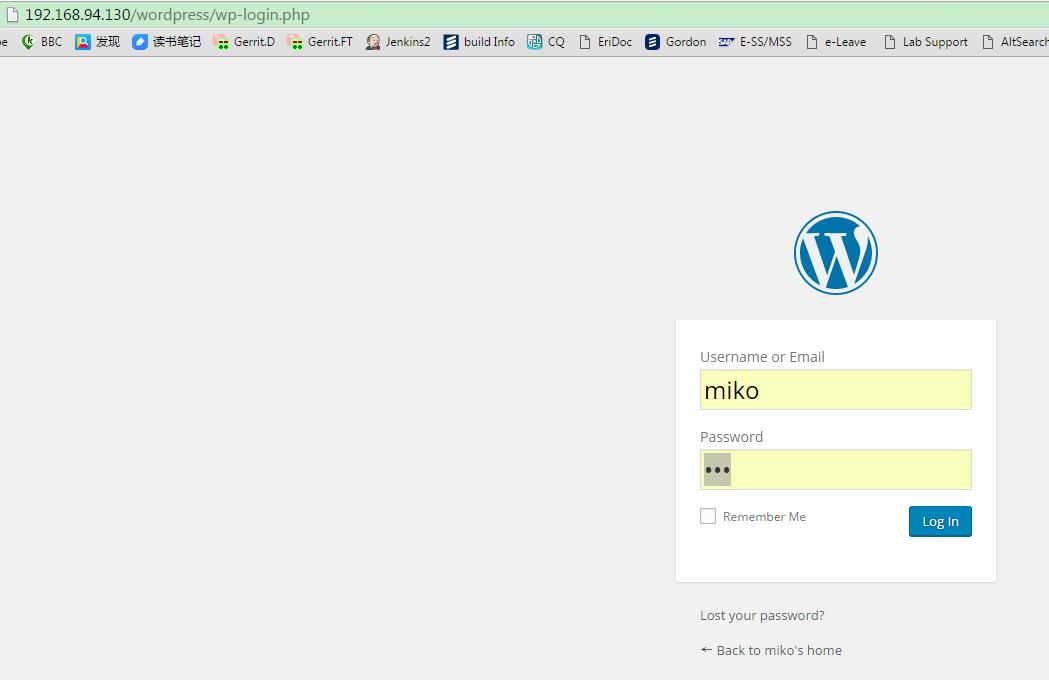
创建结束就可以登陆
http://server_domain_or_IP/wordpress/wp-login.php
FAQ
php安装出错
如果出现如下错误:
Your PHP installation appears to be missing the MySQL extension which is require
可能是PHP-mysql模块丢失造成的,重新
yum install php-mysql
,并且重启mariadb和httpd服务就可以了。
开启支持网站固定链接修改和重定向功能。
编辑主配置文件:
vi /etc/httpd/conf/httpd.conf

#AllowOverride None 修改为AllowOverride All
然后重启服务:
systemctl restart httpd.service
创建.htaccess文件:
touch /var/www/html/wordpress/.htaccess
编辑:
vim /var/www/html/wordpress/.htaccess
加入以下内容,也可以让网站自动生成。
<IfModule mod_rewrite.c>
RewriteEngine On
RewriteBase /wordpress/
RewriteRule ^index\.php$ – [L]
RewriteCond %{REQUEST_FILENAME} !-f
RewriteCond %{REQUEST_FILENAME} !-d
RewriteRule . /wordpress/index.php [L]
</IfModule>
修改.htaccess文件权限:
chmod 664 /var/www/html/wordpress/.htaccess
修改为664可以让网站支持自动更新,也可以修改为644。
Linux无法写入权限问题 & Wordpress不能自动安装主题、插件
当你的wordpress遇到以下问题时:
- 不能上传图片
- 不能自动安装主题、插件(需要FTP账户)
- 不能自动更新
- 其它任何需要
wordpress写文件的问题
这些问题基本都是一个原因,你的wordpress目录不属于当前的用户和组,即web访问的用户没有权限操作wp的一切需要写权限的操作。
其实就是linux下权限不足,无法写入造成的。
解决方法
首先需要你有root权限,SSH登录,进入到wp的安装目录:
cd /var/www/html/my_wp_blog
给予所有的写权限:
chmod 777 wp-content
接下来给你的博客的文章上传一张图片,WP会生成一个目录,然后查看是哪个用户创建了文件夹。
一般情况下,这个用户名叫apache,也有不少人发现这个用户是nobody,
我在VPS上安装的是LNMP,这个用户是www。
进入到wp的wp-content目录,查看该目录下所有文件/文件夹的权限,所属用户、用户组:
cd wp-content
ls -l
total 16
-rw-r–r– 1 root root   30 May  4  2007 index.php
drwxr-xr-x 3 root root 4096 Feb 10 19:31 plugins
drwxr-xr-x 5 root root 4096 Mar 23 03:04 themes
drwxrwxrwx 3 www www 4096 Mar 24 02:08 uploads
注意上传目录uploads 是用户 www 创建的。
接下来把wp-content权限还原到 755::
cd ..
chmod 755 wp-content
下来就是实际修复的命令了,改变wp所在文件夹的拥有者为刚找到的这个用户www:
cd ..
chown -R www:www my_wp_blog
另外一种查找当前用户和组的名称的方法
打开:
/usr/local/php/etc/php-fpm.conf
里面有 user和group项,看他们的值。
文档信息
- 本文作者:Miko Song
- 本文链接:https://sinomiko.github.io/2018/05/11/centos-lamp-wordpress/
- 版权声明:自由转载-非商用-非衍生-保持署名(创意共享3.0许可证)